 This week i have assignment is Computer network and data communication course, the assignment is setup and configure DNS server in local computer, e.g. Notebook, Netbook, Tablet or Personal Computer. Each of us must practices how to install Bind, configure the zone and create dummy domain to test that our domain is working properly. In this course, we are required to become acquainted with Linux/Unix, yet another operating system. Most of us are familiar using windows operating system, so that we must worked hard to learn this things. Fortunately i has been using linux and unix os (mac) since i studied in undergraduate, so that i can concern in material of DNS rather than console command :D..
This is step by step DNS installation on my Mac
1. Firstly, this is my machine specification:
Model Name	: MacBook

Model Identifier: MacBook5,1

Processor Name: Intel Core 2 Duo

Processor Speed:	2 GHz

Number Of Processors:	1

Total Number Of Cores:	2

L2 Cache:	3 MB

Memory:	2 GB
2. Rndc configuration, rndc is built in utility in mac to help us, creating dns and Dns Configuration files, this is command listing
whitebox:~ macbook$ sudo -s

Password:

bash-3.2# rndc-confgen -b 256 > /etc/rndc.conf

bash-3.2# head -n5 /etc/rndc.conf | tail -n4 > /etc/rndc.key
3. Make sure that port running on rndc dan named.conf is same, this is command to check both files
bash-3.2# more /etc/named.conf | grep 'inet.*\?port'

inet 127.0.0.1 port 54 allow {any;}

bash-3.2# more /etc/rndc.conf | grep '\-port'

default-port 953;
Default port of rndc.conf is 953, we must change the default port as the named.conf port, in my case i using #54 (port 54) in rndc.conf files.
4. Enable the Bind Services, we will make launcher in mac os, after booting this services will loaded automatically. we can execute the following command as bellow:
# launchctl load –w /System/Library/LaunchDaemons/org.isc.named.plist

# echo "launchctl start org.isc.named" >> /etc/launchd.conf
if our system is baefore 10.5, we must add this following command to enable sevices dns
# echo "DNSSERVER=-YES-" >> /etc/hostconfig
we can direct execute the application using this command:
# launchctl start org.isc.named
5. Named Configuration
Actually the Mac os is has already been installed Bind and rndc as default dns application, so the above instruction just enabling the services and create our configuration. Firstly we create zone files (primary zone and reverse zone) and the second is added entries in named.conf. In this example I create domain name wonogiri.edu, and this is the zone configuration files:
$TTL    86400
$ORIGIN wonogiri.edu.
@ 1D IN SOA  wonogiri.edu  info.wonogiri.edu (
20110327        ; serial
3H              ; refresh
15M             ; retry
1W              ; expiry
1D )            ; minimum

1D IN NS        @
1D IN A         172.16.10.99
wonogiri.edu            IN NS           ns.wonogiri.edu.
www                     IN      A       172.16.10.99
ns                      IN      A       172.16.10.99
akademik                CNAME           www
and this is the reverse files
$TTL    86400
$ORIGIN wonogiri.edu.
@  1D IN SOA  wonogiri.edu @ info.wonogiri.edu (
20110327        ; serial
3H              ; refresh
15M             ; retry
1W              ; expiry
1D )            ; minimum

1D IN NS        @
1D IN A         127.0.0.1
22                              IN PTR          wonogiri.edu.
99.10.16.172.in-addr.arpa       IN PTR          wonogiri.edu.
this is entries in /etc/named.conf, i usually using vim for my default editor 😀 :hammer:
zone "wonogiri.edu" IN {

type master;

file "wonogiri.zone";

allow-update {none;};

};
zone "rev.wonogiri.edu" IN {

type master;

file "rev.wonogiri.zone";

allow-update {none;};

};
after finish the configuration, we must reload our rndc services to make sure the dns running well with new configuration.
# rndc reload
6. the last step is setting up our name server, in this case mac os is so difficult to set up the nameserver in console mode, we must using our GUI, yeah..most geek people is prefer to use command line rather than gui 😀
# ifconfig en0 172.16.10.99

# echo “nameserver 172.16.10.99” > /etc/resolv.conf
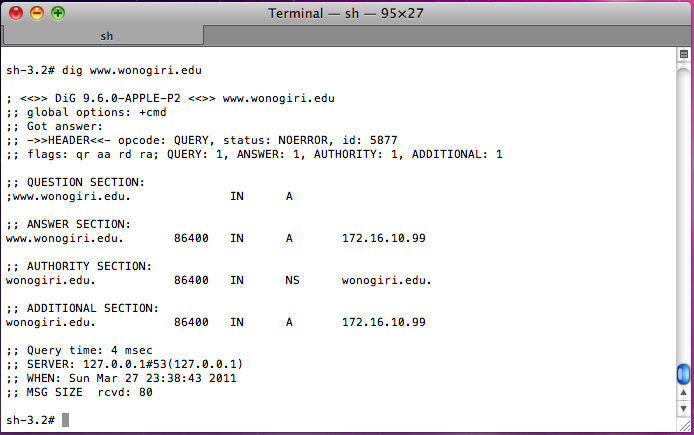
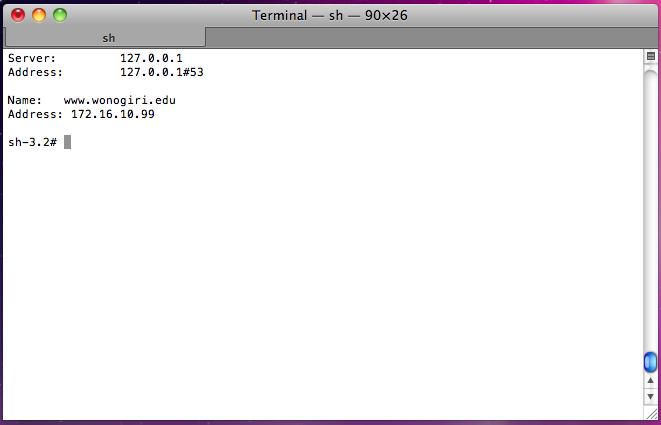
7. Tesing our buddy dns, using dig and nslookup..
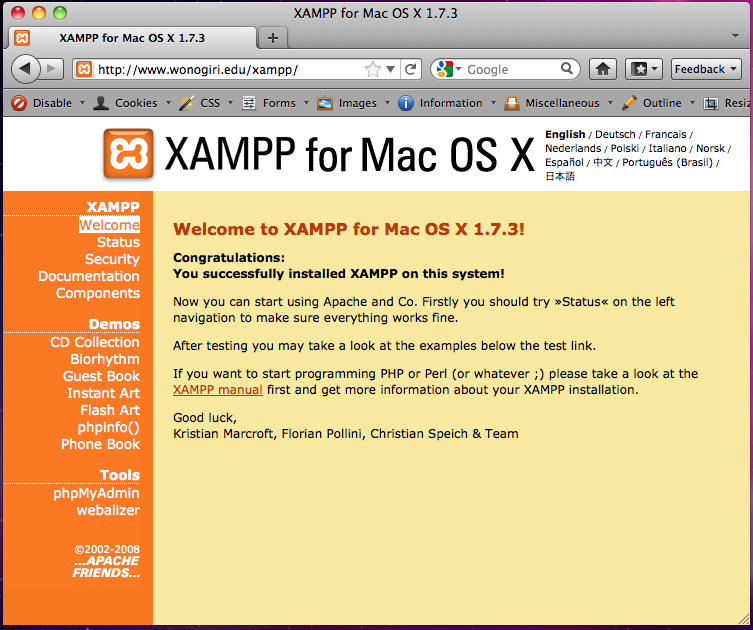
this is my result ..not too bad


matur suwun atas bimbingannya.. nice share